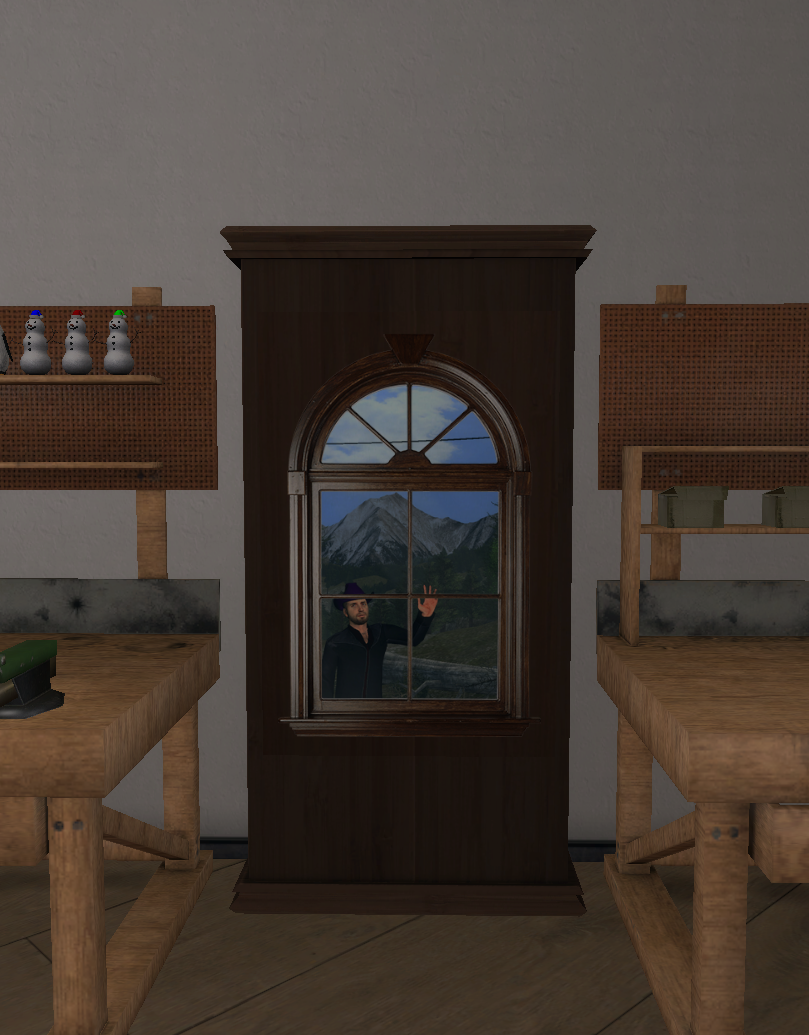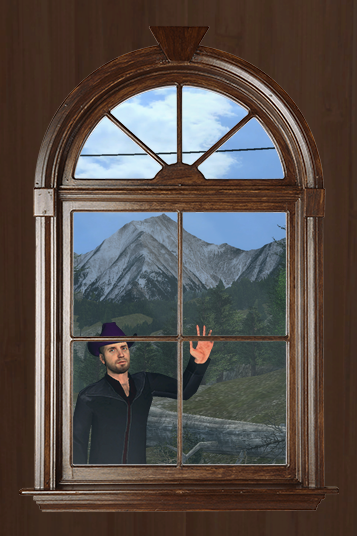
Flags are super thin image displaying props that are very underutilized. I made this tutorial to showcase "blend-in" graphics you can do with them. This effect works better since v6 because the maps are more bright.

To do this you take screenshots of the background that is behind the flag, for details on how to correctly save screenshots in .png format please consult the image cutout guide.
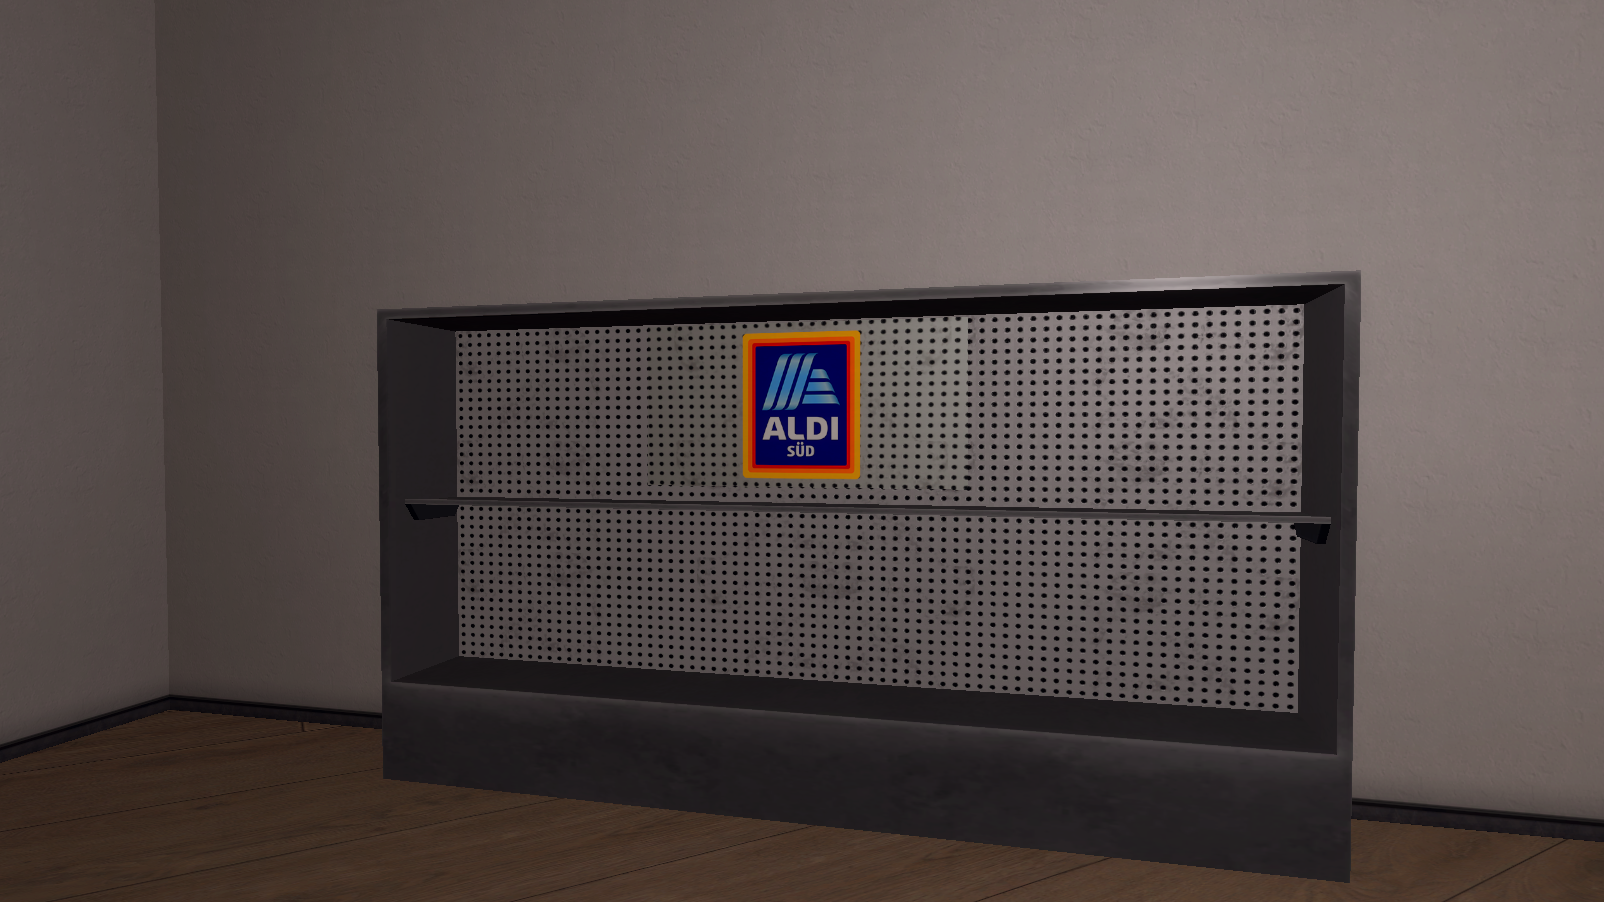
Here are some examples I've made, you can use them, the metal shelve is not very good it was a little rushed, i will try again tomorrow.
Special thanks to @Creepis for his help.
To do this you take screenshots of the background that is behind the flag, for details on how to correctly save screenshots in .png format please consult the image cutout guide.
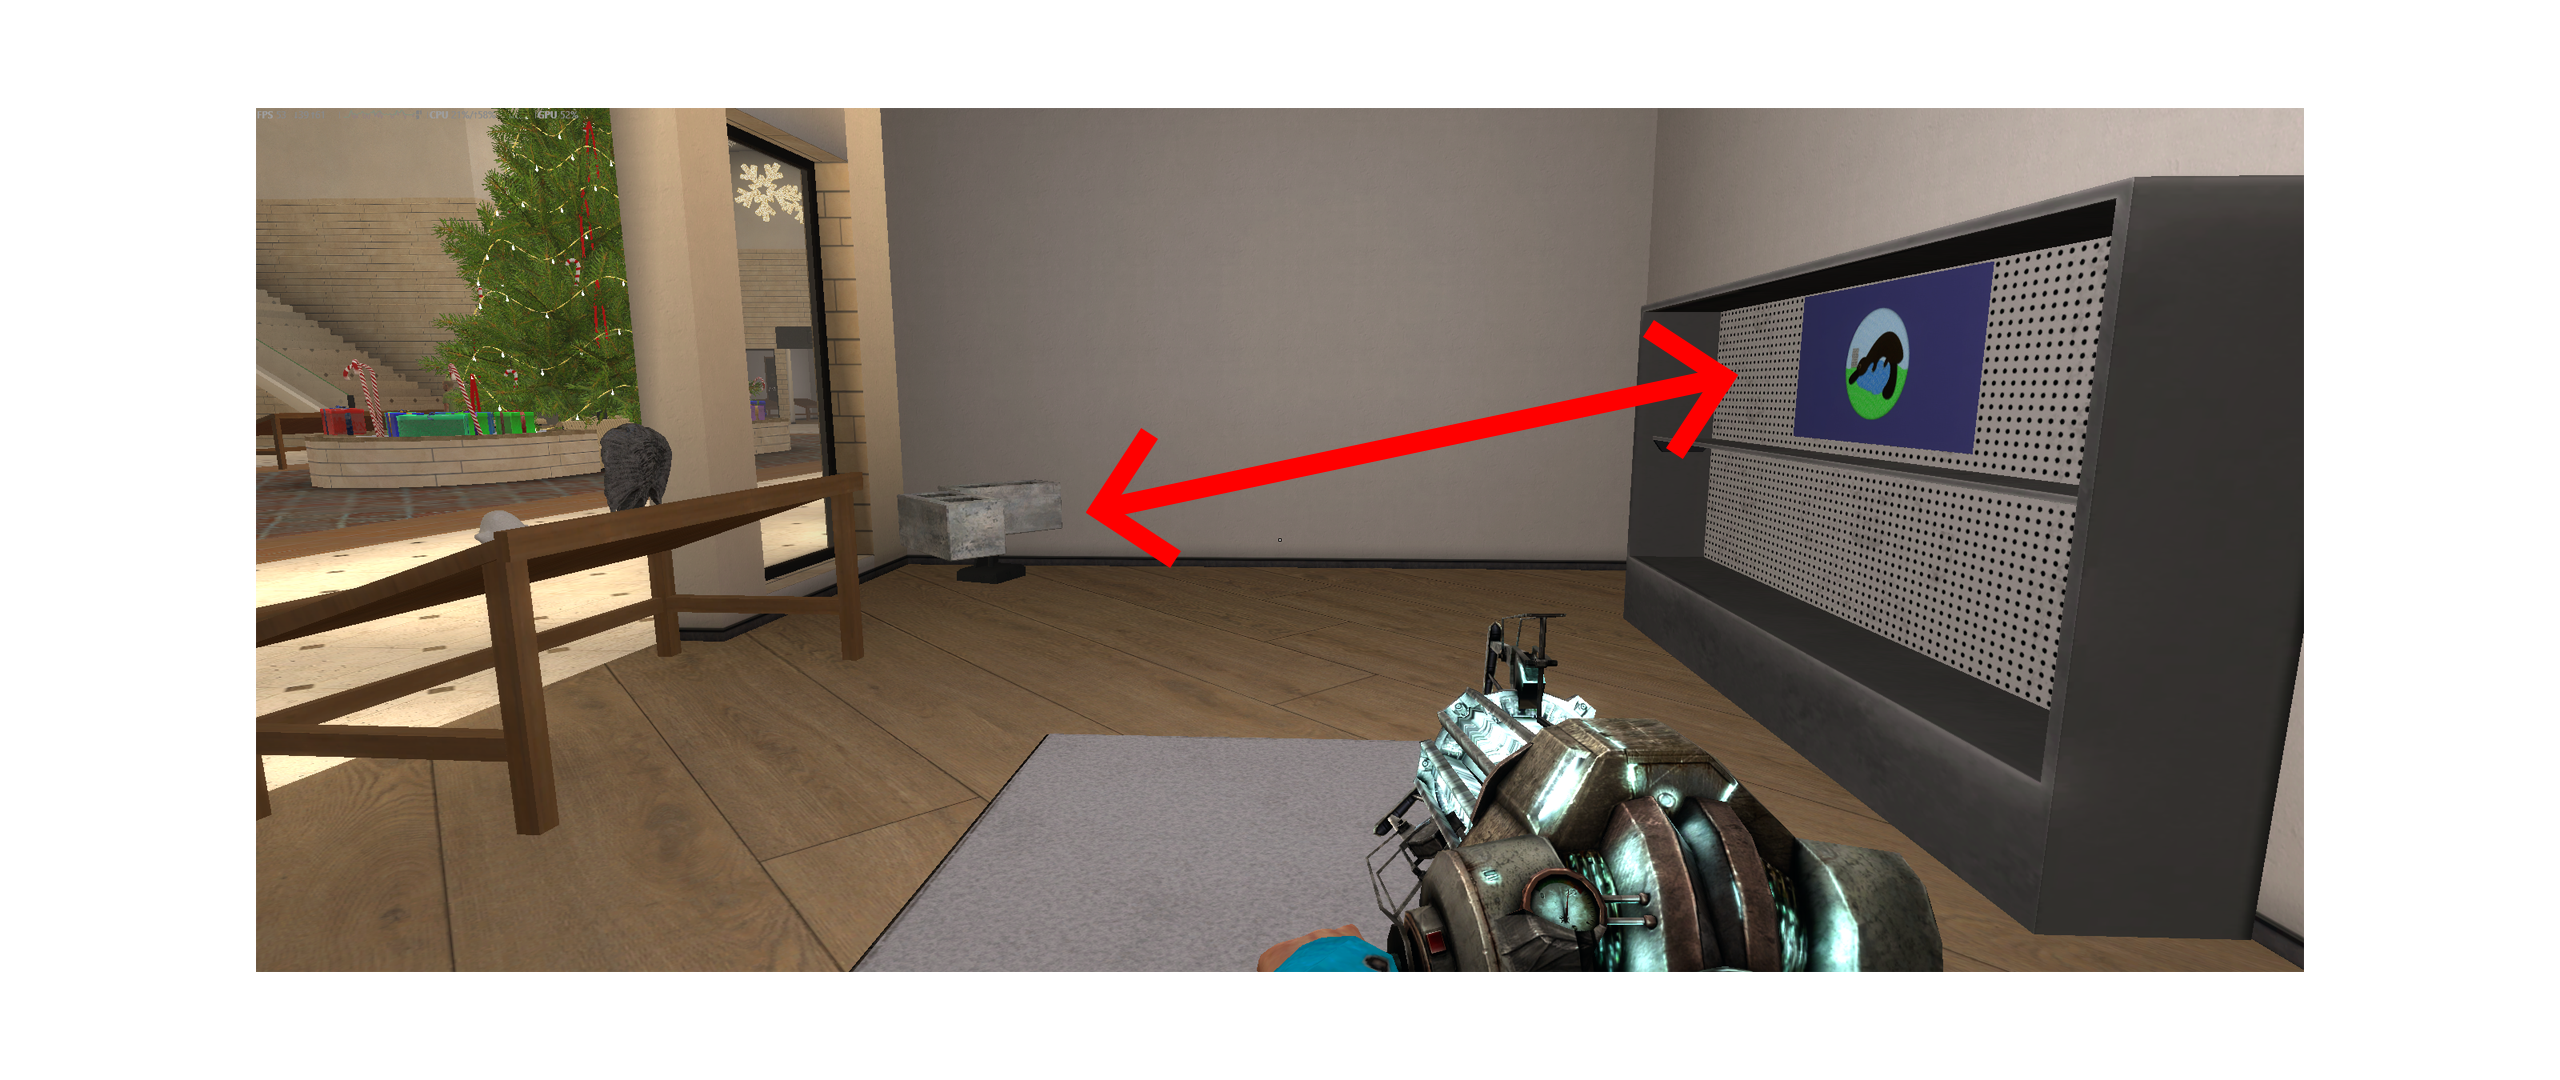
- First you have to decide the distance and angle where the graphic should look good from.
- You can place 2 props to "fix a corner" and help you not move around when taking pictures
- From that position fix your crosshair on 1 spot, take the screenshot (without a camera, because it changed FOV)
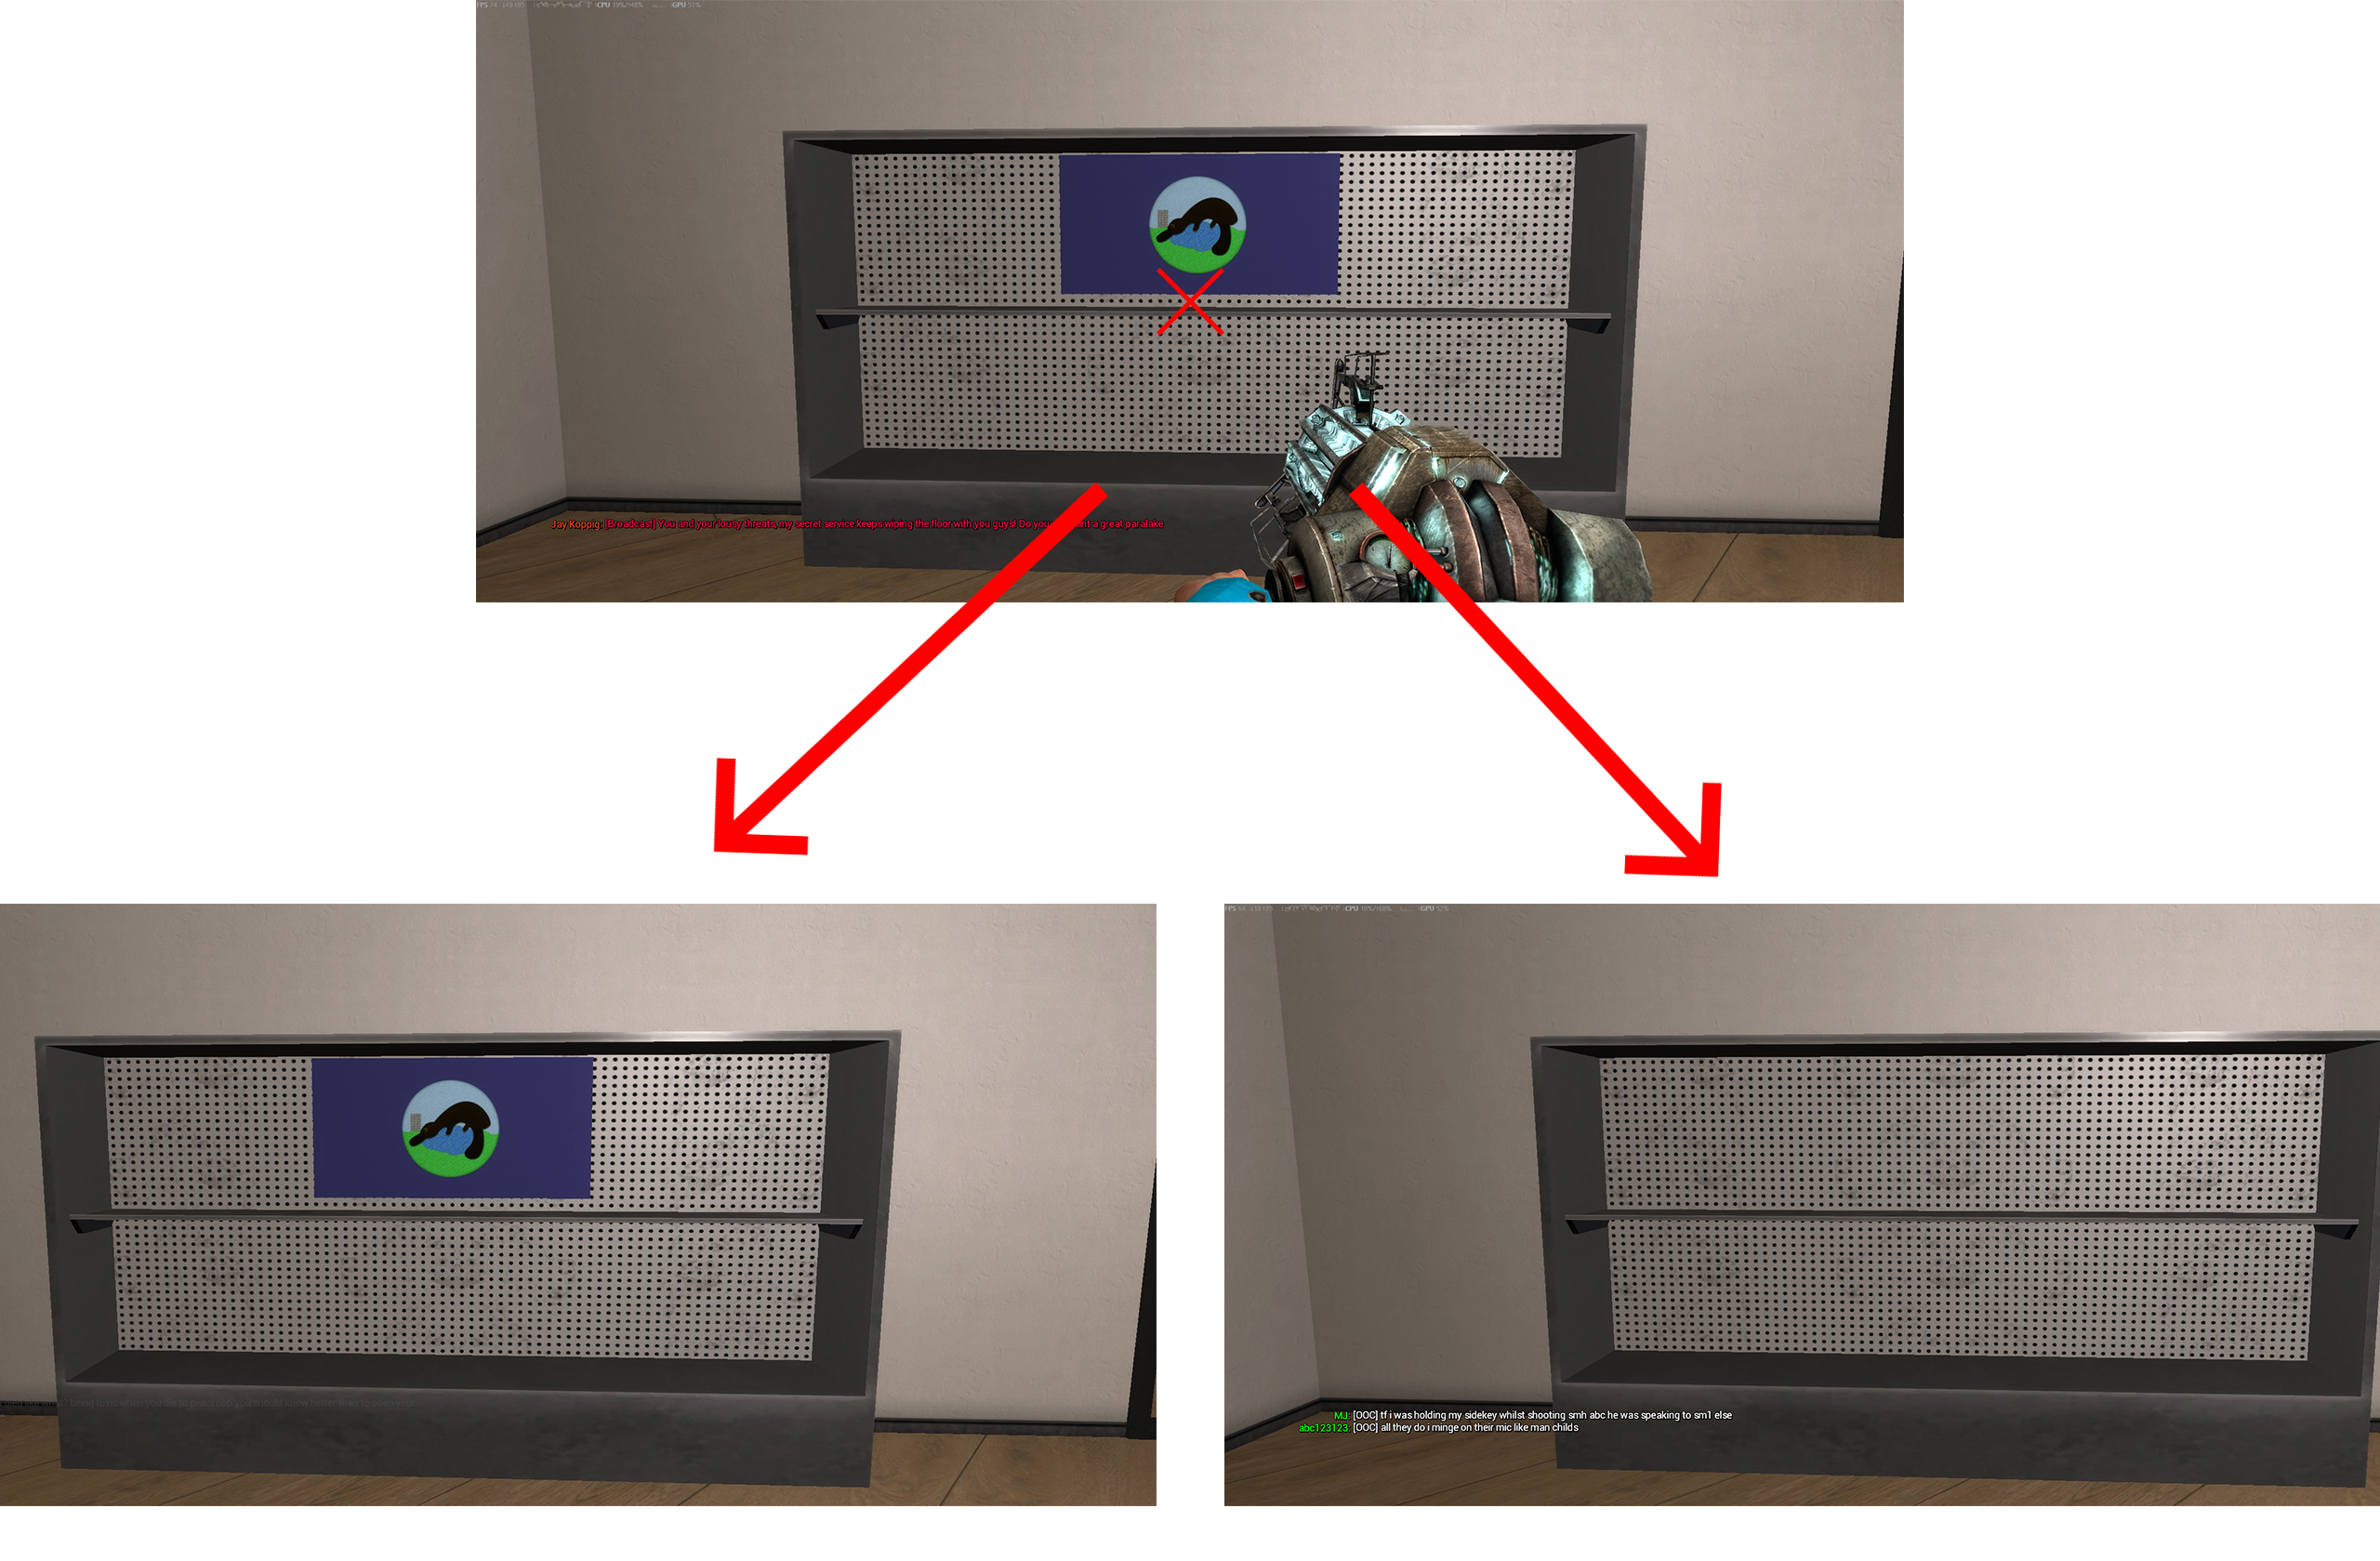
- Then use your pysgun to move or pick up the flag and take another screenshot with the exact same distance/angle
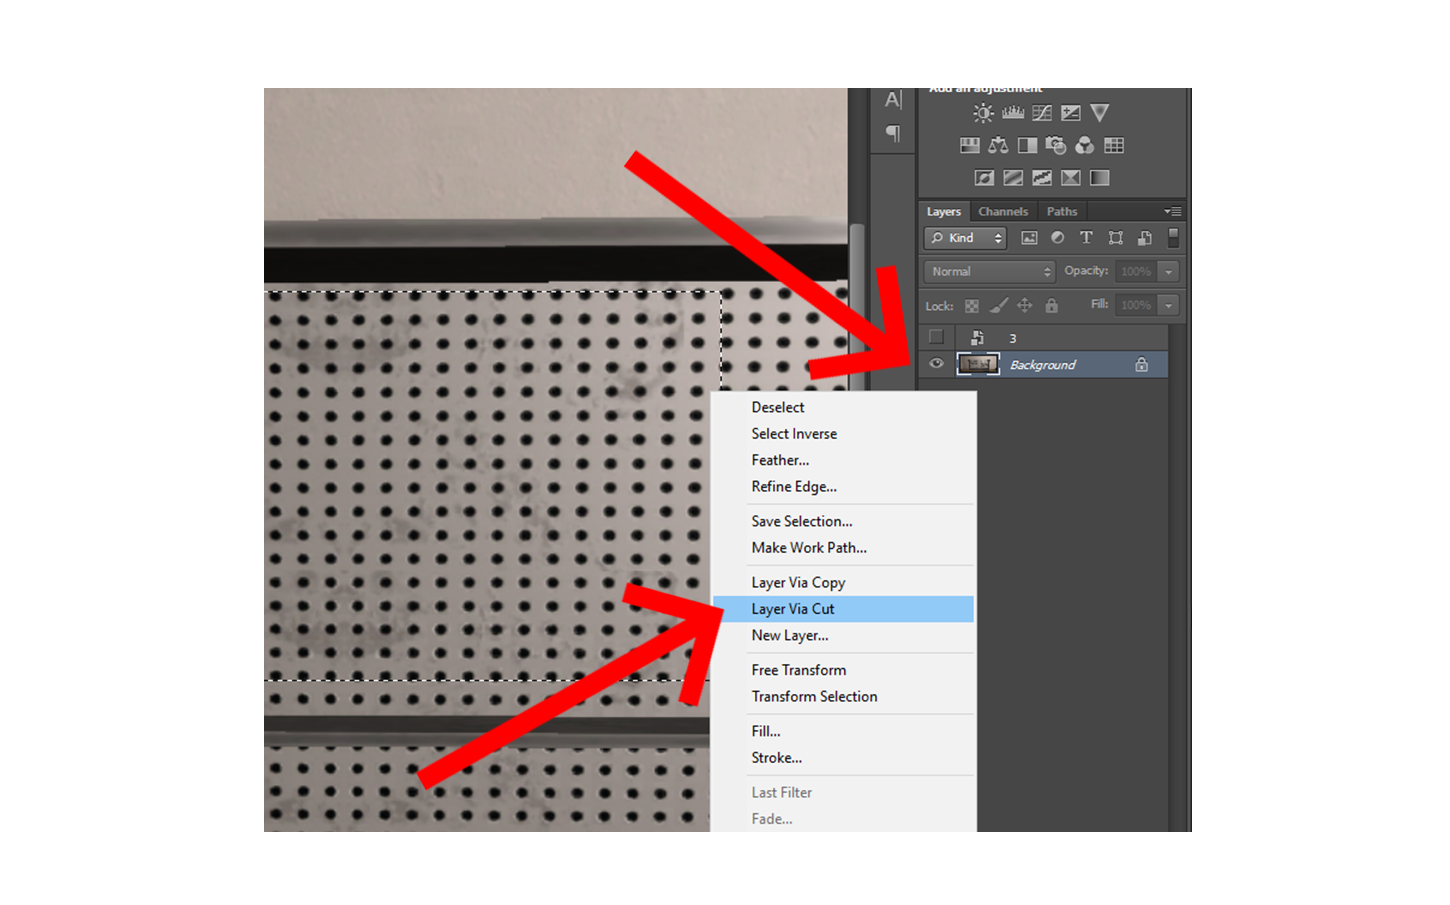
- Layer both images on top of each other in your image editing program
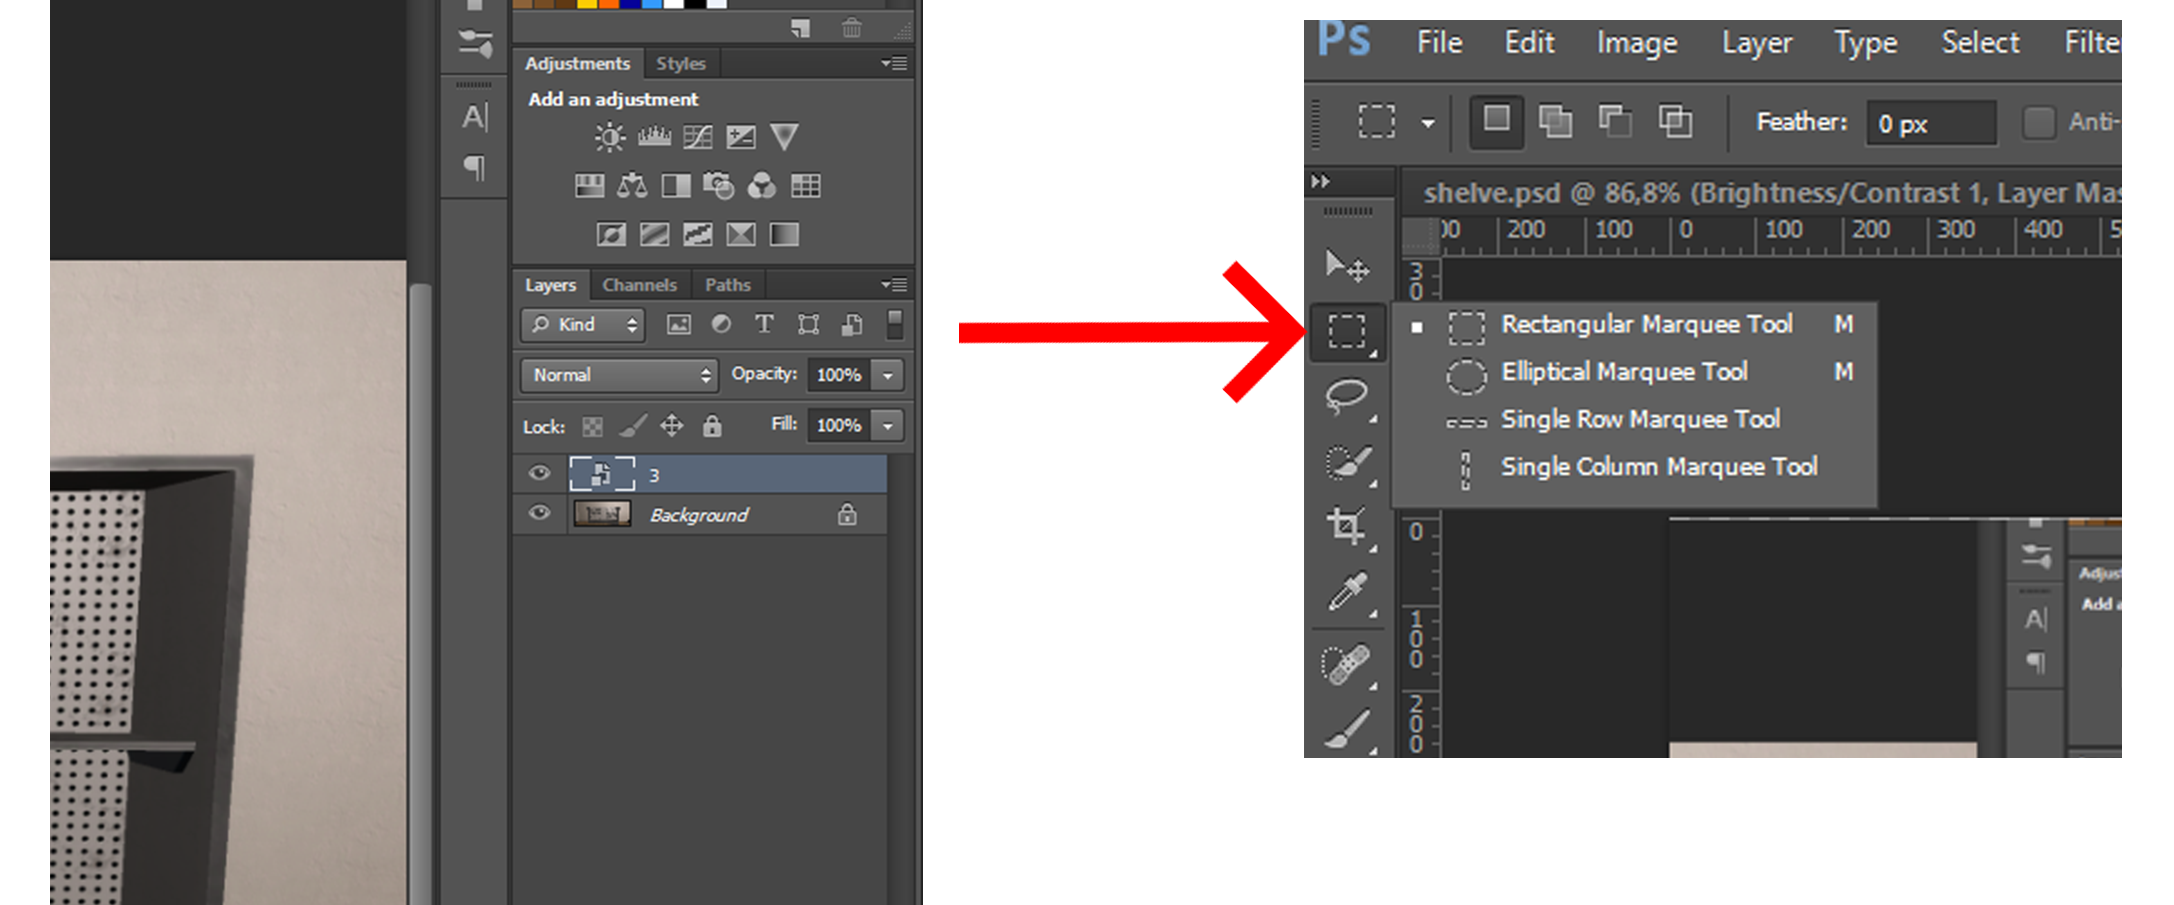
- Then use on the selection/cutout tool.
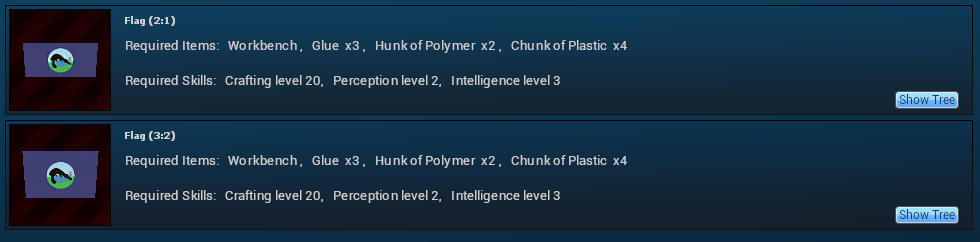
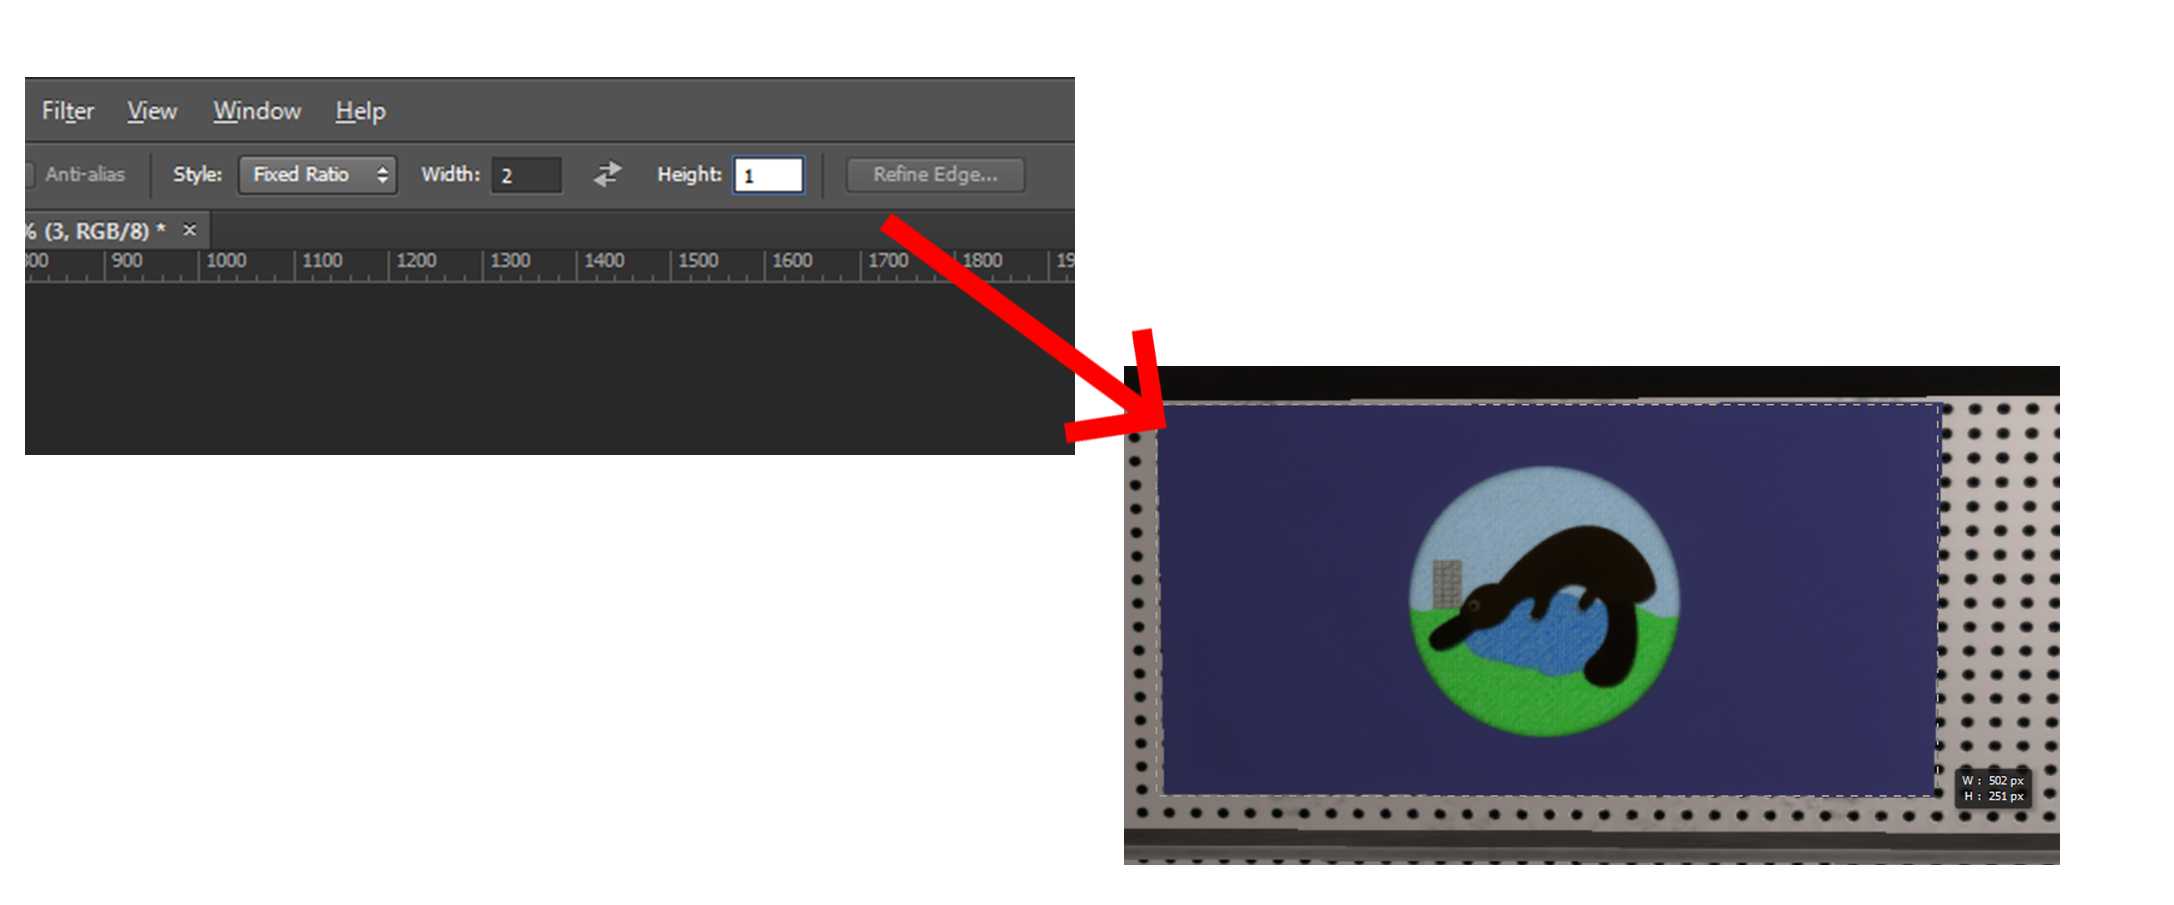
- Set a fixed ratio for the selection (3:2 for big flags and 2:1 for smaller ones) and select the exact outlines of the flag
- Then switch to the other layer and cut out the part where the flag would be
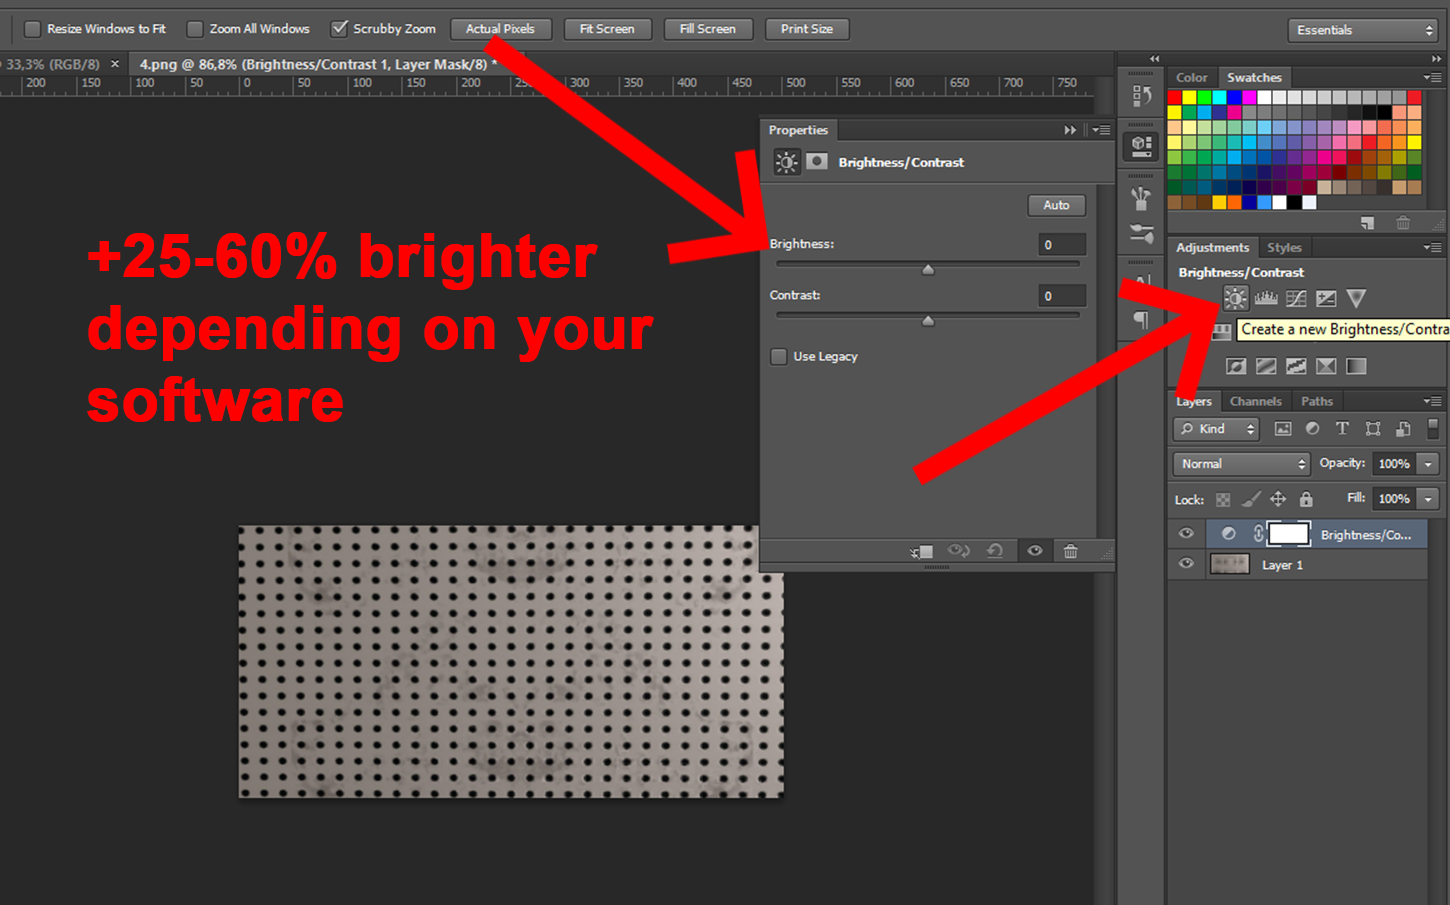
- FLAGS ARE LESS BRIGHT THAN OTHER IMAGE FRAMES. you have to slightly adjust the brightness for it to look right. It is worth a couple tries.
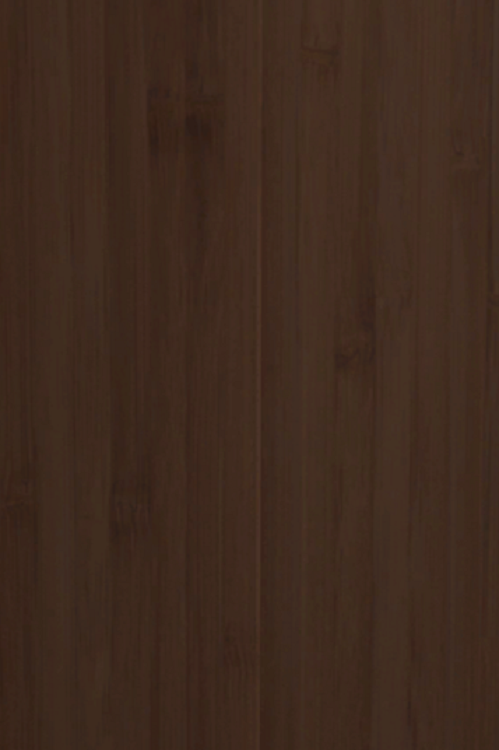
Here are some examples I've made, you can use them, the metal shelve is not very good it was a little rushed, i will try again tomorrow.
Left side of Transit Van (White)
Backside of Bookshelve
Metal Store Shelves Large (work in process)
Special thanks to @Creepis for his help.
Last edited: